
Car ownership sits on a rising cost curve, and maintenance keeps inching upward right alongside everything else. The U.S. CPI series for motor vehicle maintenance shows prices holding at elevated levels through 2025, so every small task you can handle on your own becomes a little pressure valve that takes stress off your wallet.
AAA’s 2025 “Your Driving Costs” report makes the pattern easy to see. Maintenance, repair, and tires form a real slice of the per-mile cost, and when you run a typical year of driving at roughly 15,000 miles, it lands as a noticeable part of your budget.
You do not need a full shop. You do not need a rack of specialty tools. You only need a steady method, basic gear, and a clear sense of where DIY actually pays off.
The tasks below follow three rules. They save money, they lower the odds of bigger repairs, and they fit into normal life without turning your driveway into a long project zone.
Before you touch a wrench, set a small foundation of habits that keep you safe and prevent expensive mistakes. When you build habits that actually stick, even a quick tool like an AI checker can help you verify instructions or double-check a step before you grab the wrench.
- Follow your owner’s manual before anything else. Random internet advice about oil viscosity, coolant type, or fluid capacity is how engines end up with the wrong products inside them.
- Work on a cool car unless the procedure requires warmth.
- If you lift the car, use jack stands on a firm surface. A jack by itself is a lifting tool, not a safety device.
- Do not ignore warning lights. FuelEconomy notes that a check engine light can be a loose gas cap or something that drops fuel economy, increases emissions, and grows into a costly issue if left alone.
- Dispose of fluids properly. EPA guidance calls for correct handling and recycling. Dumping oil into drains causes real environmental harm and fines.
Now for the part that actually saves money.
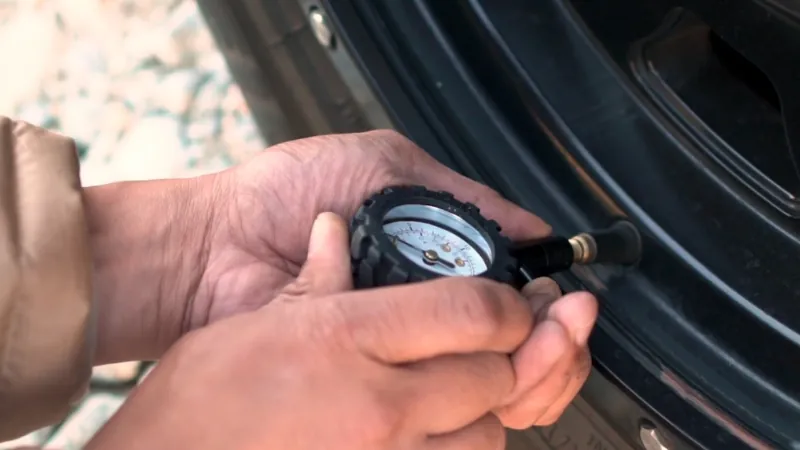
1. Check and Adjust Tire Pressure Monthly
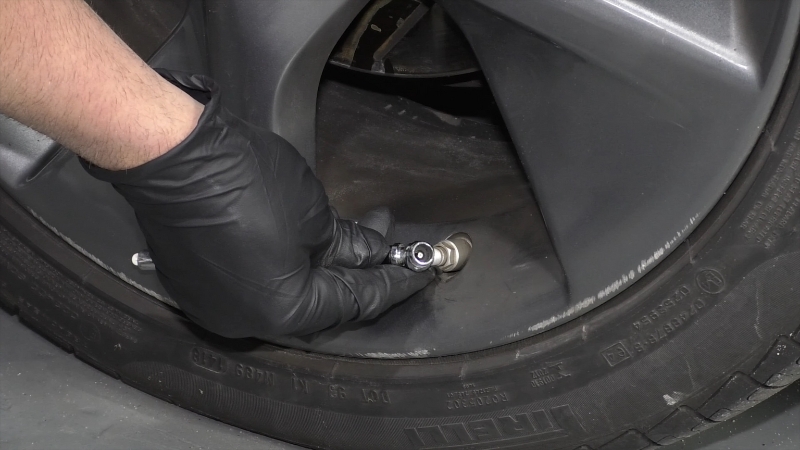
Tire pressure is the easiest DIY habit with the highest payoff. It takes two minutes, costs almost nothing, and pushes savings into two categories: fuel and tire longevity.
NHTSA points out that properly inflated tires can save up to 11 cents per gallon and extend average tire life by roughly 4,700 miles. FuelEconomy.gov estimates a 0.6 percent improvement in gas mileage on average, with gains reaching 3 percent in some cases.
Underinflation works against you fast. The site notes a drop of about 0.2 percent in fuel economy for every 1 psi below the recommended level.
DOE-controlled tests back that up. At 75 percent of the recommended pressure, fuel economy dips around 2 to 3 percent across tested speeds. At 50 percent, the penalty grows sharply, especially in lower speed conditions.
How to Do It
Check pressure when the tires are cold. A car that has sat overnight or at least several hours will give the best reading. Use the pressure printed on the driver’s side door jamb sticker, not the maximum rating stamped on the tire.
That rating is only a structural limit. Add air with a portable inflator or station pump until you hit the recommended range.
Tools
- Tire pressure gauge
- Portable inflator, optional but handy for monthly checks
2. Inspect Tread and Basic Tire Condition
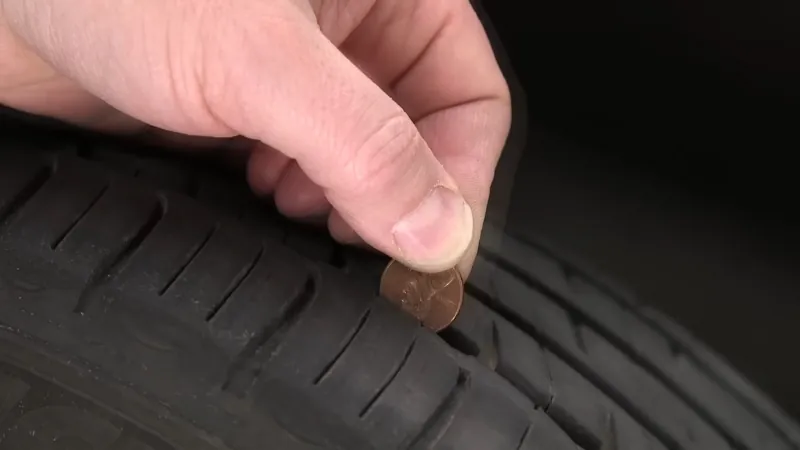
Pressure alone does not tell the whole story. A quick visual scan every month can alert you to worn edges, alignment issues, or damage from road debris.
Quick Checks
- Look for uneven wear between the inner and outer tread. That can hint at alignment trouble or chronic underinflation.
- Scan for bulges, deep cracks, or exposed cords.
- Look for nails or screws that have not produced a flat yet but will soon.
- Rotate tires according to your manual. NHTSA notes that rotation, balance, and alignment keep tires lasting longer.
You do not need to unmount anything. A small flashlight and a few minutes of patient scanning solve most of the early-detection work.
3. Replace Windshield Wiper Blades
Wiper blades are one of the cheapest maintenance tasks you can handle. They also matter for safety. When rain or slush hits, visibility becomes a fast-moving variable, and worn blades exaggerate the problem.
The Car Care Council suggests replacing blades around every six months. Heat, cold, and UV exposure break down the rubber, and streaking usually shows up before the blade snaps entirely.
RepairPal’s cost estimates also give a useful reference point for shop labor. Once you see how simple the install is, the DIY path becomes obvious.
How to Do It
Buy the correct length for each side. Lift the wiper arm gently, press the release tab, slide the old blade out, and click the new one into place.
Clean the windshield afterward. A clean glass surface reduces chatter and extends blade life.
4. Replace the Cabin Air Filter
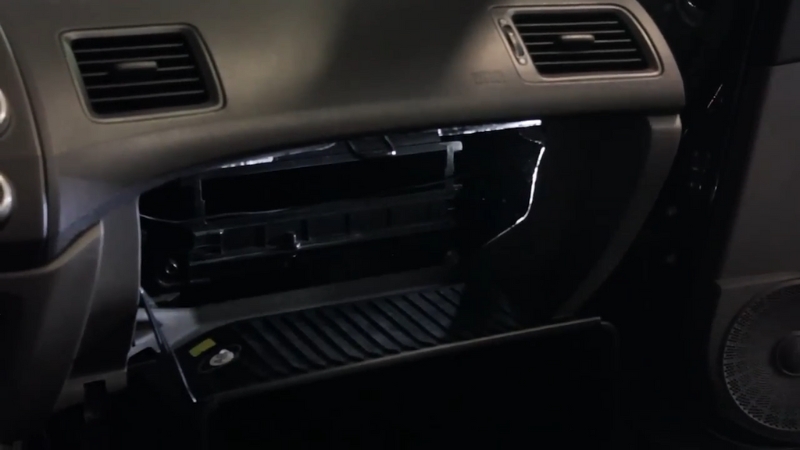
Cabin air filters often sit behind the glovebox and take five to fifteen minutes to replace. A clogged filter reduces HVAC airflow and can create odors. Car Care Council points out that a musty smell can come directly from a dirty filter.
How to Do It
Remove the glovebox or access panel, open the filter housing, and note the airflow direction arrow.
Swap the filter, reassemble, and check the airflow after you start the car. RepairPal’s typical shop ranges help quantify savings. Most vehicles ask for such a simple filter swap that doing it yourself feels natural after one try.
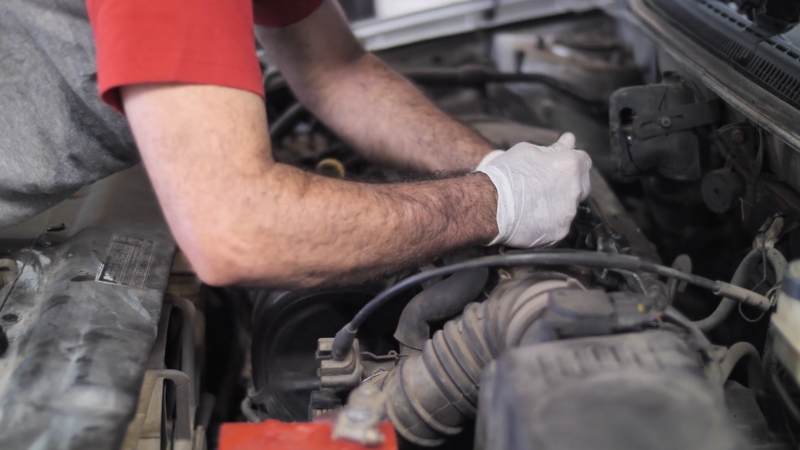
5. Replace the Engine Air Filter
View this post on Instagram
In modern fuel-injected engines, replacing the engine air filter does not produce a big fuel economy change. Only older carbureted engines see mileage gains from a fresh filter.
Modern engines adjust for airflow electronically.
The real value sits in protecting engine components. An engine consumes over 10,000 gallons of air for every gallon of fuel. Dirt protection grows crucial under that scale.
How to Do It
Most airboxes open with clips or a few screws. Remove the old filter, clear debris from the housing, and install the new filter.
Seal the box carefully so unfiltered air cannot slip through gaps. RepairPal’s ranges again help benchmark shop costs. Many shops charge labor for a task that takes less than ten minutes.
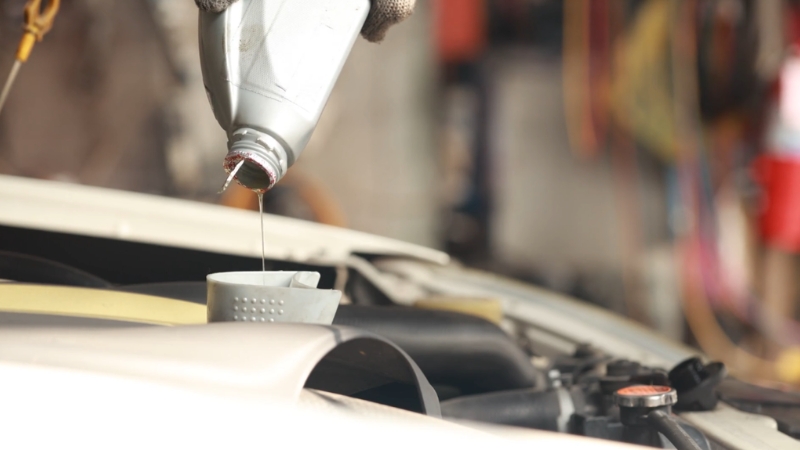
6. Use the Recommended Motor Oil Grade and Perform Oil Changes Only When You Can Do Them Correctly
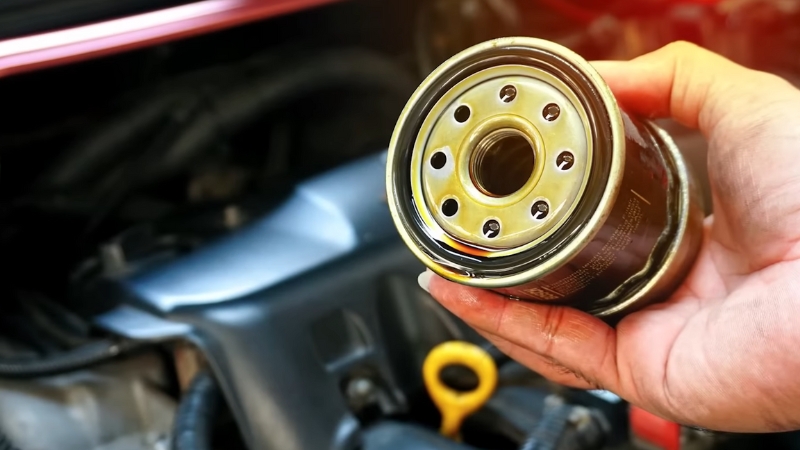
Oil changes bring a mix of savings and risk. You can save money if you follow the procedure and the manufacturer’s specifications without shortcuts.
FuelEconomy notes that using the recommended oil grade can improve gas mileage by around 1 to 2 percent. Using a thicker oil than specified can reduce mileage by the same amount. That means oil selection is not a guess. It is a specification.
Car Care Council also stresses proper disposal of used oil. EPA guidance reinforces that used oil needs correct recycling, not dumping.
When to DIY Oil Changes
Do oil changes yourself only when you can confidently handle:
- Correct viscosity and spec, including API, ILSAC, or manufacturer approvals
- Correct oil filter
- New drain plug washer if required
- Accurate torque on the drain plug
- Accurate measurement of oil added
- A recheck of the level after a short run cycle
If any step feels uncertain, skip this category for now and handle easier tasks first.
7. Keep the Gas Cap Sealed and Respond Quickly to a Check Engine Light
@gillspointstire Please make sure you close and lock your gas caps ⛽️🚙 #cars #carmaintenance #cartok #car #truck #trucks #trucktok #gillspoints ♬ original sound – Gills Point S Tire & Auto
A loose gas cap ranks among the most common triggers for a check engine light. Ignoring the light can reduce fuel economy and turn a minor issue into a larger repair bill.
What to Do
Tighten the cap until you hear clicks. If the seal is cracked or worn, replace it. If the light remains on, read the code with a simple OBD-II scanner or have a shop read it.
Guessing can send you down a costly path of replacing good parts.
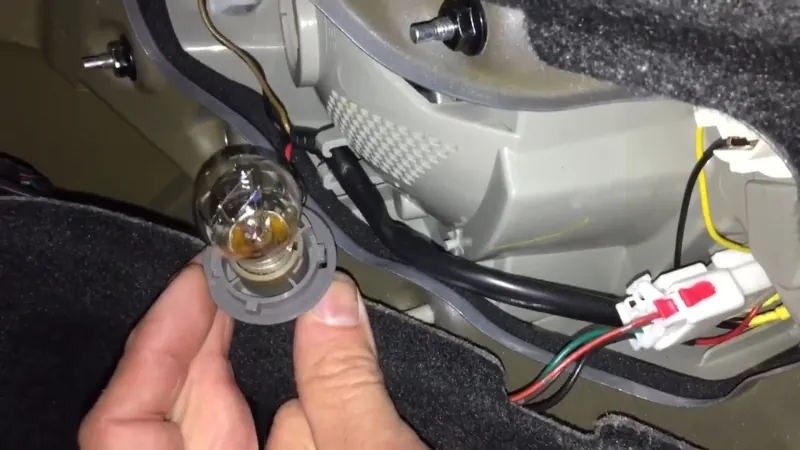
8. Replace Burned-Out Bulbs and Keep Lighting Reliable
Lights are inexpensive, yet critical for safety and legal compliance. We recommend checking headlights, brake lights, turn signals, flashers, and interior lights regularly, and you can also inspect them at every oil change.
How to Do It
On cars with accessible housings, remove the cover, detach the connector, and swap the bulb. Avoid touching halogen glass with your bare hands since oils can shorten its lifespan.
Confirm the function before putting tools away. If your car requires bumper removal for a headlight bulb, think twice before forcing it. Paying for labor once may be smarter than breaking plastic clips repeatedly.
RepairPal’s ranges help determine whether your model is friendly for DIY. Some are straightforward. Some are buried.
9. Clean Battery Terminals and Watch Battery Age
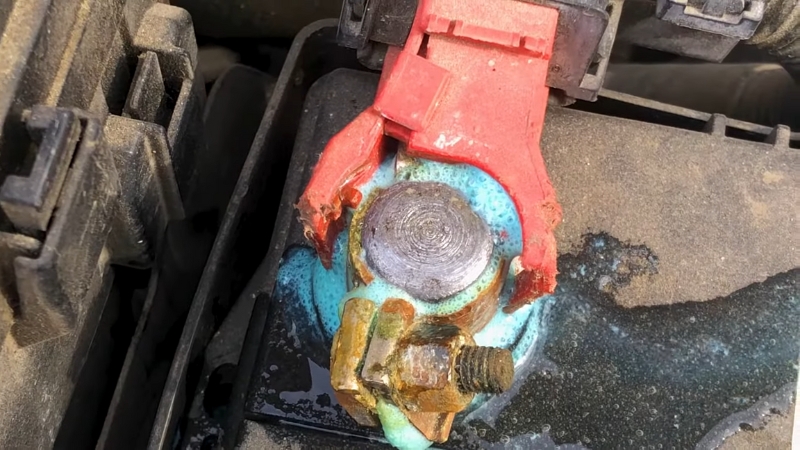
A battery with mild terminal corrosion can cause poor starts and charging trouble. Cleaning the terminals is simple, and it often restores solid electrical contact.
Test the battery every fall. Batteries older than three years carry a higher failure risk.
Simple DIY
Disconnect the negative terminal first, then the positive. Clean corrosion with a terminal brush and appropriate cleaner.
Reconnect positive first, then negative, and apply terminal protectant if you want extra resistance to future corrosion.
10. Top Off Washer Fluid and Keep the Windshield Clean
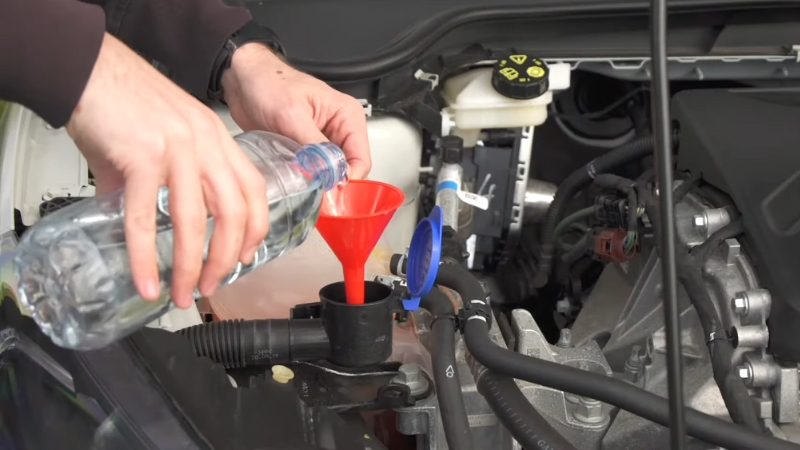
Washer fluid might feel small, but it supports visibility, blade longevity, and general safety. NHTSA’s safety checklist mentions keeping spare washer fluid on hand.
Open the hood, locate the reservoir with the windshield symbol, and fill it until the level meets the mark. Clean the windshield regularly to help your wipers last longer.
A DIY Savings Table Grounded in Reality
Your car and your region influence prices, but RepairPal’s standardized cost ranges give a consistent base for comparisons.
| Task | Typical shop cost (RepairPal) | Typical DIY parts cost | Typical time | Skill level | Main savings driver |
| Engine air filter replacement | See RepairPal estimate | $10 to $30 | 5 to 15 min | Low | Avoid labor markup |
| Wiper blade replacement | See RepairPal estimate | $20 to $60 pair | 5 to 10 min | Low | Avoid labor |
| Cabin air filter replacement | See RepairPal estimate | $10 to $40 | 5 to 20 min | Low | Avoid glovebox access labor |
| Headlight bulb replacement | See RepairPal estimate | $10 to $50 | 10 to 60 min | Low to medium | Varies by access |
Use the table as a decision filter. Cars with simple layouts favor DIY. Cars that bury parts behind trim deserve a careful call.
A Simple Maintenance Cadence That Matches Daily Life
Monthly
- Check tire pressure
- Scan tread for abnormal wear
- Top off washer fluid
- Clean the windshield
Every Six Months
- Inspect wiper blades and replace if streaking
- Inspect battery terminals for corrosion
At Every Oil Change Interval
- Do a quick walk-around light check
- Look for uneven tire wear
- Check cabin air filter if airflow is weak or the HVAC smells musty
Avoiding “Fake Savings” That Lead to Bigger Bills
DIY only saves money when mistakes are avoided. The most common money traps include:
- Overfilling oil
- Mixing incompatible coolant
- Ignoring torque values on drain plugs and wheel lugs
- Guessing at the check engine causes
FuelEconomy.gov captures the core point. A check engine light can indicate something small, but it can also warn about a problem that affects fuel economy and emissions. Waiting too long can turn it into a far more expensive fix.
The $0 Driving Adjustment That Saves Money
Did you know: Aggressive driving can lower fuel economy by 33% on the highway and 5% around town. Be safe and save money!
— DoyleChapmanMotors (@DoyleChapmanMot) April 11, 2013
Driving behavior is a maintenance task in its own way. Car Care Council notes that speeding, aggressive acceleration, and jerky driving can reduce gas mileage by up to 33% on the highway and around 5 percent in the city.
A smoother style, combined with properly inflated tires and the correct oil grade, produces an immediate fuel benefit without touching a tool.
When to Hand the Job to a Professional
DIY has limits, and knowing them protects both your wallet and your safety.
Leave these categories to a trained technician unless you have experience and proper equipment:
- Brake hydraulic work, such as bleeding or caliper service
- Steering and suspension components under load
- Airbag systems or advanced driver assistance hardware
- A/C refrigerant handling and seal work
Car Care Council points out that A/C service requires qualified handling and refrigerant recycling.
Final Thoughts
DIY car maintenance works best when you approach it like a set of small habits, not a giant project. Inflation pressures remain high in vehicle maintenance, and AAA’s cost breakdown shows how fast small services add up over a year of driving.
A handful of predictable tasks can cut that load without pulling you into anything risky or complicated.
Start with tire pressure. Add filters, blades, fluids, and bulb checks. Build a rhythm that fits into your month, not your weekend. The payoff arrives in longer component life, fewer surprises, and a car that feels cared for without draining your budget.